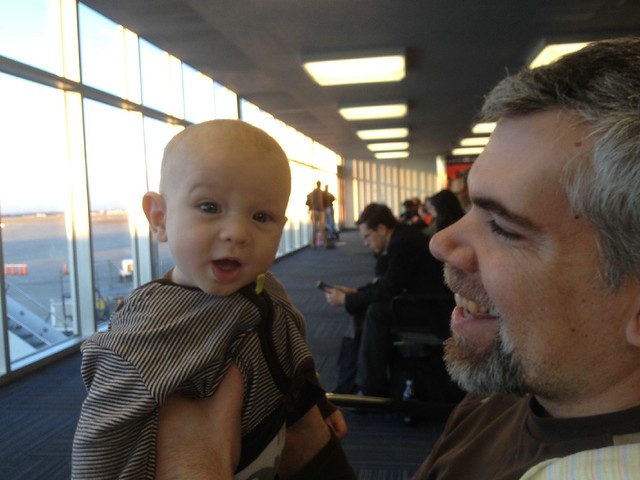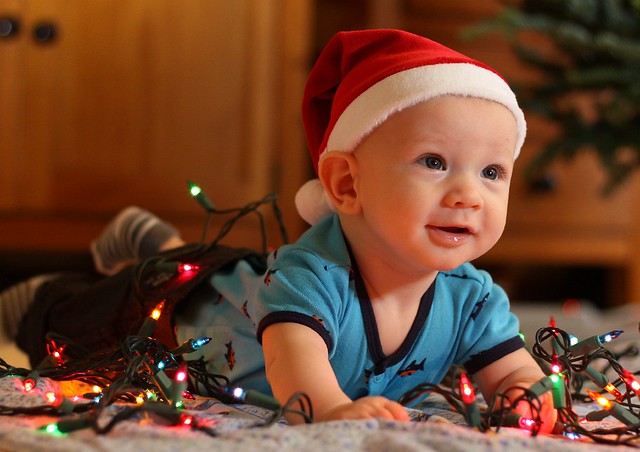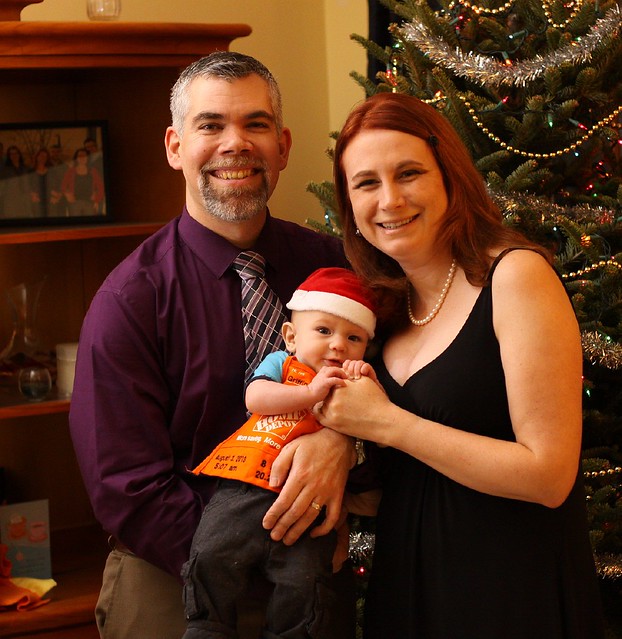
We visited my family in Tulsa, OK for Thanksgiving. By we, I mean myself, Jenn, and Griffin. This was Griffin’s first plane ride. More importantly (WAY more importantly) this was Jenn and my first plane ride with Griffin. Jenn and I have observed new parents having a hard time wrangling their child in the midst of all the hustle and bustle of an airport and we decided we were going to be prepared.
We looked online and queried acquaintances and just thought about the types of issues that might arise from traveling with Griffin. From those came three things: Two lists, and a Process.
First off: This is a long and wordy post. For the Too Long; Didn’t Read, I Just Want the Damn Packing List, it’s right here, in conveniently bulleted format. However, you may want to read the “whys” of various bits as some will apply to your particular situation, and some will not. For that, scroll past and keep reading.
Traveling With an Infant (on a Plane) ((No Snakes, Please.))
For the Plane (Carry-On)
- Backpack (1)
- Burp Rag (1)
- Wipes (full travel container)
- Diapers (6)
- Diaper Cream packets (3)
- Gallon Ziplocks (2)
- Receiving Blanket (1)
- Changing Pad (Travel-type, 1)
- Breast-Feeding Cloth (1)
- Pacifiers (3)
- Tethers for Pacifiers (3)
- Toy (1)
- Bottles with pre-measured formula (2)
- Bottles for water for pre-measured formula (2)
- Bottle of Breast Milk (1)
- Spare outfit for kid (1)
- Spare shirt for adults (1 each)
- Baby Harness (1)
- Bib (1)
- Rubber Gloves (1 pair)
- Nipple Shield (2)
- Sanitizer Bottle (1)
- Ear Plugs for others (24 pairs)
- Quart Ziplock for TSA Security screening (1)
- Copy of Birth Certificate (1)
For the Check Baggage
- Container of Formula (1, with measuring scoop)
- Car Seat, with cover (1)
- Wipes, in a double ziplock container (A bunch)
- Diapers (30)
- Breast Pump and all Parts
- Breast Milk Bottles (2)
- Breast Pump Bra
- Burp Rag (2)
- Boppee (1)
- Diaper Cream Tube (1)
- Clothes for Kid (3 Days+ extra)
- Jacket for Kid in Cold Weather (2)
- Hat for Kid in Cold Weather (2)
- Sleep Sack (1)
- Swaddle (1)
- Toys (2)
- Sheets for Pack & Play (1)
The Lists, Expanded
These lists were built with the following assumptions in mind, which should help you modify them to your own needs:
- Four day, three night trip
- The destination had a Graco Pack and Play we could use
- The kid’s primary food source is breast milk
- Total travel time between houses (driving to airport, airport time, travel time, driving to house) was about six hours
- The kid is not exceptionally messy (spare outfit for plane is a precaution, not a necessity)
- This trip was an infant-in-arms ticket. No additional seat was acquired for Griffin.
The other thing to keep in mind is that I’m giving you the whole, unedited list as we built it for our needs. Obviously, you will have your own “normal” with your kid. For example, the nipple shield Jenn uses may be entirely unnecessary for you.
Here’s the list with annotations:
For the Plane (Carry-On)
- Backpack (1). My personal opinion on diaper bags is that they’re overpriced and hard to use for other things after the kid has grown out of them. So instead I bought a backpack for longer days away from home. ((We have a small bag from a conference we use for short trips.)) Also, from long experience traveling by air, I hate shoulder bags for carry-ons. Backpacks all the way.
- Burp Rag (1). No explanation necessary. I kept it in the outside mesh pocket of the backpack for easy grabbing when needed.
- Wipes (full travel container). You need wipes. I have one of those plastic travel containers that we keep wipes in. It’s about 3/4″ thick and holds enough for a day.
- Diapers (6). I figured that six diapers was enough to get us through six or so hours, unless it was a really bad day. Griffin has never had a day where he went through six diapers in six hours.
- Diaper Cream packets (3). We have little travel packs of diaper cream that we got as free samples. These get through TSA security in the quart ziplock.
- Gallon Ziplocks (2). One of the gallon ziplocks is used to hold the spare outfit, so that if it becomes necessary, you just swap the new outfit in the ziplock with the old. Smelliness contained! The other Gallon ziplock is for storing soiled diapers and wipes until a trash can is found.
- Receiving Blanket (1). We love receiving blankets for their all-around usefulness. They’re burp rags, they’re blankets to keep him warm, they’re blankets to put on the floor if you need to put him down.
- Changing Pad (Travel-type, 1). We have a small folding changing pad for travel. Keep in mind that many aircraft do not have a changing table in the lavatory. If you use the lavatory, you’ll have to lay the kid on the changing pad on the toilet. It’ll be a balancing act.
Breast-Feeding Cloth (1). We brought this, but Jenn did not end up using it because of the warmth (she and Griffin were getting too hot). She’s also very good about breast-feeding discreetly out in the middle of public areas. We’ll probably take it off the list next time.- Pacifiers (3). They’re small so I threw all of the ones we were bringing into the backpack.
- Tethers for Pacifiers (3). This is an absolutely essential item. You do not want the pacifier to get flung out, onto the floor of the plane (yuck) and then roll four rows backward while the kid is screaming. I ended up traveling with a pacifier clamped to my shirt so that it would always be available.
- Toy (1). We brought one toy to keep him occupied.
- Bottles with pre-measured formula (2). I pre-measured the formula so that all we had to do was mix it with the pre-measured water and BAM, we could feed the kid in about eight seconds. This is especially important on take off and landing when they’re little ears start to pop, but they don’t know how to do it. Sucking on a bottle and swallowing will help them equalize their ears. If you’ve ever wondered why kids tend to scream during take off and landing, that’s why.
- Bottles for water for pre-measured formula (2). You’ll have to carry the bottles empty through the TSA security line. Don’t forget to fill them when you get through. I use the same bottles that are needed for the breast pump.
- Bottle of Breast Milk (1). We packed a full (10 oz) bottle of breast milk to keep the kid fed as needed. While the plan was to breast feed him when we could, that takes time and sometimes you just need to plug him, give him some food, and then keep moving to make your flight. Note that Breast Milk is not subject to the TSA three-ounce limit for liquids going on planes. However you have to show it to them, and they may open it and sample it to be sure it’s not an explosive. It’s also only good for five hours once you’ve gotten it out of the mother (or refrigerator) thus why we also brought formula.
- Spare outfit for kid (1). As I mentioned above, the spare outfit is packed into the ziplock, ready to go if needed. If it’s not needed, you’re already packed for the trip home!
- Spare shirt for adults (1 each). Just in case there’s an issue. Notice that we didn’t pack full spare outfits for ourselves. It’s our experience that Griffin is only likely to yak up or otherwise make a mess on our shirts. Your experience may be different.
- Baby Harness (1). We debated for a while about whether to bring the stroller and car seat combination to the gate, or to carry the kid in a chest harness. There are arguments to be made in both directions about whether it’s easier to use a stroller or to carry the kid in the harness. We ended up choosing the harness because we weren’t going to need the stroller at our destination so it would only be used for the walk to and from the airline gates.
- Bib (1). For drool. Our baby drools.
- Rubber Gloves (1 pair). For just-in-case, Oh-My-God moments of disaster. We’ve never needed to use them, and I hope we never do. They’re tiny and can be stuffed into a corner and they’re there, just in case.
- Nipple Shield (2). Jenn uses them. They’re on the list.
- Sanitizer Bottle (1). For cleaning the hands. You’re in an airport with lots of people and germs. This will go into the quart ziplock for TSA screening.
- Ear Plugs for others (24 pairs). Another just-in-case item. I have a box of disposable ear plugs from Home Depot. I brought a bunch just in case the flight turned into a Griffin screaming disaster.
- Quart Ziplock for TSA Security screening (1). If you’re flying with fluids in your carry on, they have to be in less than three ounce containers and you have to have them x-rayed at security in a clear quart-sized ziplock. This post is written as of December of 2013, so make sure the TSA rules are still the same before showing up at the airport.
- Copy of Birth Certificate (1). I have no idea how necessary it is to be able to demonstrate some proof that this child is yours. I mean, it could be any child, even if you have a birth certificate with you, right? But, we were traveling out of state and I felt it couldn’t hurt to have a copy of his official document. We plan to get him a passport soon and that will be his travel document.
For the Check Baggage
- Container of Formula (1, with measuring scoop). We breast feed the kid but it’s faster to make up a formula bottle than it is to heat up a bottle of breast milk in the fridge. Also, we need formula for the plane trip (see above). Therefore, a sufficient amount of formula was needed.
- Car Seat, with cover (1). To get to and from the airport, you need a car seat (generally) ((This made me wonder what happens if the airline loses your car seat. Do they have spares for people just in case? Would we have to rent one and get reimbursed?)). I used a large contractor-grade trash bag to cover the seat for when it went onto the plane and keep it from getting dirty/wet. Note that someone from Delta took the bag off the seat between when we checked it in Tulsa, OK and it arrived in Atlanta. This annoyed me. It might be worth it to get a dedicated cover.
- Wipes, in a double ziplock container (A bunch). I brought a brick-sized stack of wipes in a ziplock inside a ziplock to carry us through the trip and to replenish the travel container.
- Diapers (30). For my kid nine diapers a day over four days equals thirty-six. Six of them were already in the carry-on. Nine was my high number for use; I didn’t want to have to buy diapers in Tulsa.
- Breast Pump and all Parts. Jenn needs to pump and we also felt it was important to give relatives the opportunity to feed Griffin.
- Breast Milk Bottles (2). For the breast pump.
- Breast Pump Bra. For Jenn while breast pumping.
- Burp Rag (2). Never hurts to have spares.
Boppee (1). We put this on the list but did not end up bringing it. It wasn’t necessary.- Diaper Cream Tube (1). We put a larger tube of diaper cream in the check bag.
- Clothes for Kid (3 Days+ extra). Normal packing for clothes. We weren’t that stressed about clothing because there was a washer and dryer available, but we wanted him to be cute in his various outfits!
- Jacket for Kid in Cold Weather (2). It was going to be chilly. We brought two so that if he messed one up, he could wear the other while the first was being washed.
- Hat for Kid in Cold Weather (2). Ditto.
- Sleep Sack (1). He likes sleep sacks.
- Swaddle (1). He also likes swaddles.
- Toys (2). And he likes toys.
- Sheets for Pack & Play (1). My sister had an old Pack and Play we could use, so we just needed to bring some sheets for it.
Those are the Lists, now lets talk about the Process.
It’s all well and good to have everything you need, but if you don’t think about how and when you will use the various items, you may end up digging through all your crap looking for a pacifier when it should have been right there all along.
We got a lot of good advice from one of Jenn’s co-workers at The Home Depot, Jonna. Rather than rewrite a bunch of stuff, I’m going to quote it (with permission) and annotate it.
It’s easiest to get through security with the baby in a “baby Bjorn” than in a car seat/stroller. At ATL, they don’t require you to take it off. Your return airport might though…
Getting through ATL and Tulsa security was easy for Jenn who just walked through the metal detector with Griffin in the carrier. I still had to be patted down but Jenn did not. We noticed on the way home that a man went through the metal detector along with his wife, so next time I’ll make an effort to say “Hey, I’m with them and don’t want to be separated”.
The Baby Bjorn makes life easier on the plane too. Holds the baby for you so your hands are free to do other things. And being that close and warm helped my kids sleep on flights.
This one didn’t work out so well for us. Griffin is of a size where if we’re wearing him, it difficult to do anything and he likes to bounce which means constant head-butts.
Once my kids were sitting up, I chose to always check the car seat and carry the stroller to the gate.
When you return to Atlanta, checked car seats do not come out with the normal luggage but WAAAAY over on the right side with oversized baggage. Have your baggage tag handy.
If you don’t have an official travel cover for your car seat and you want to check it, a sturdy black garbage bag will usually do. Alternatively you can buy a car seat bag from Delta for $5. My husband makes them put the baggage sticker on the handles/ties. That way when we pull it off at our destination, we can reuse the bag – otherwise, pulling the sticker will leave a hole in the bag and you’ll have to trash it.
Note what I said above about our choice of carrier vs. stroller. Just think about what’s going to work best for you.
It’s easiest if your diaper bag is a backpack.
Put sanitizer, cell phone, wallet, ID and boarding pass in exterior pockets that you can reach without taking the bag off and opening it up.
I will go further and say, “While you’re at home, think about everything that will or may happen while you’re traveling.” You’ll have to pass through security. You’ll have to change a diaper. You’ll have to feed the kid. You’ll have to juggle your carry-on, your kid, and your boarding pass when you get to the gate. You’ll need to have certain things with you at your airline seat, and certain things can stay in your carry-on. What happens if your carry-on is three rows up in an overhead compartment and you can’t get to it? What happens if your kid has a poop-splosion? What do you need to do when you leave the house, get to the airport, get to the gate. Where are the bottles of formula? Where are the pre-measured water bottles?
The more you think about these things ahead of time and mentally practice the various tasks you’ll have to do at the airport, the less stressful this will all be.
I have no idea how new travelers who’re not used to managing airport security also manage kids at the same time. What a nightmare.
What everyone says is true – it’s best if you can manage to give a bottle on the way up and on the way down.
If your baby likes pacifiers, that’s great. Make sure to have several where you can reach them while belted in. Nothing worse than having one fall during takeoff and roll several rows back while your baby is wailing.
Kids don’t know how to clear their Eustachian tubes during pressure changes (ear popping). We fed Griffin with a bottle on the climb out and on the descent. On the second trip, he was fast asleep on the descent until he would suddenly wake up with this “What’s HAPPENING?!” look on his face whereby we would plug him with the bottle, he’d suck and swallow a few times, then go back to sleep.
If your little one is eating, I try to have several snacks/meals that don’t stain:
My kids liked cheese sticks and mandarin orange snack cups.
Gerber ready to eat meal bowls (little filled raviolis) are good for traveling. I’m not saying they are good for anything else. J If the flight isn’t full the flight attendant will warm it for you, but they can be eaten room temp and they are filling.
We won’t need to worry about that for a bit.
Try to choose outfits that are a separate top and bottom with no snaps. Ideally even if there is a blowout, you will only have to change out the bottom piece rather than do a full wardrobe change in the tiny airplane bathroom.
We went with this advice, thankfully unneeded. We do, however, have an anecdote to share about changing Griffin on the plane. We had just climbed to altitude when he announced his desire to be changed. He had obviously filled his diaper. Jenn and I decided that instead of sending me to the lavatory to awkwardly change him on a toilet seat, we’d put down the tray tables and lay out the changing pad right there in our row.
Thank god we did. He was a disaster within his diaper. Also, thank god that there was no blowout, but the little dude had managed to coat himself on every surface within the diaper. It took two of us and four hands to manage the process in a clean and sanitary fashion. I’m afraid that if I had been doing it myself in an airplane lavatory that the room would have looked like an episode of Dexter, except with poop.
So that is our first experience traveling with the kid. It was smooth and easy. We didn’t forget anything, and I’m happy to say that we didn’t have an excessive amount of extra stuff either. We used all that stuff up there on the list. Packing for babies is tough!
Good luck, and if this list helps you or you have some suggestions, let me know!